
Crontab is a powerful tool for scheduling and automating repetitive tasks on your system. Whether you need to run background jobs, execute scripts, or automate server processes, knowing how to install crontab in Ubuntu can save time and reduce human errors. This guide walks you through each step in simple, easy-to-understand language.
Use Cases of Cron Functionality
Cron is widely used in software development and server administration. Some practical use cases include:
- Running Background Jobs: Automate scripts that clean up files, process data, or update system resources at scheduled times.
- Database Backups: Schedule regular database dumps or backups to prevent data loss.
- System Maintenance: Automatically clear temporary files, rotate logs, or update software packages.
- Monitoring Tasks: Run scripts to check server health, monitor websites, or trigger alerts when specific conditions are met.
Using cron ensures tasks are executed consistently, without manual intervention, improving efficiency and reliability.
Installing Crontab on Ubuntu
Follow these steps to install and set up crontab on your Ubuntu system:
Before installing any new package, it is good practice to update your system’s package list to get the latest available versions:
sudo apt updateInstall cron using the package manager. Cron is the service that allows scheduled tasks to run automatically:
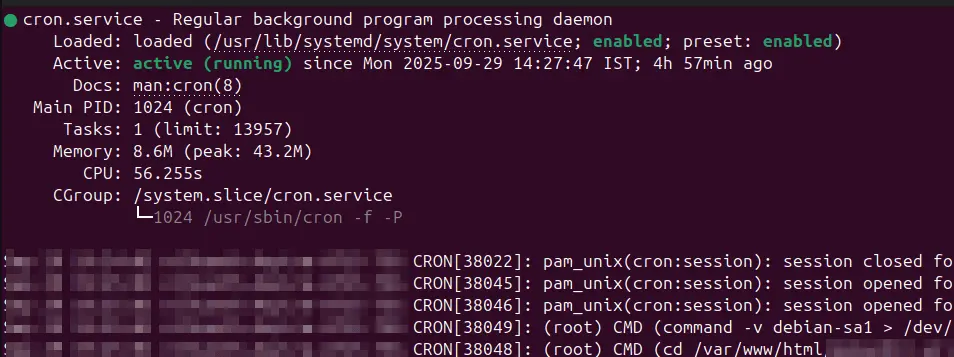
sudo apt install cronAfter installation, you have to verify that the cron service is active and running on your system:
systemctl status cronYou should see the service as active (running) like shown into below image.
Next thing you need to do is, Ensure that cron starts automatically whenever your system reboots. This is important to keep scheduled tasks running without manual intervention:
sudo systemctl enable cron

sudo systemctl start cron
Following these steps, your Ubuntu system will have a fully functional crontab setup, ready to schedule and automate various scripts and background jobs efficiently.
Editing and Managing Crontab Jobs
Crontab allows you to schedule commands or scripts to run automatically at specific times. You can edit crontab for the current user or for the superadmin (root) user depending on your needs.
// Current user
crontab -e

// Root User
sudo crontab -e
The Crontab file format consists of five time fields followed by the command. Here is sample command to understand it.
* * * * * command-to-executeHere. The first field represents the minute and can be set from 0 to 59. The second field is the hour, ranging from 0 to 23. The third field specifies the day of the month, which can be any number from 1 to 31. The fourth field indicates the month, with values from 1 to 12. Finally, the fifth field represents the day of the week, where 0 or 7 is Sunday and the other numbers correspond to the remaining days. Together, these fields define exactly when a command or script will run.
For better understanding, let’s take an example. You want to perform resource cleanup using python script daily at specific time then your command should look something like below:
0 2 * * * /usr/bin/python3 /home/user/scripts/cleanup.pySave and exit the editor. Cron will automatically pick up the changes. To list current cron jobs for this user:
crontab -l
Crontab makes it simple to automate recurring tasks, schedule scripts, and manage server processes efficiently.
Conclusion
Knowing how to install crontab in Ubuntu is essential for automating background jobs, system maintenance, and repetitive tasks. With cron, you can schedule scripts, run processes at specific intervals, and keep your system organized without manual effort. By following this guide, your Ubuntu server is ready for reliable automation of tasks.
For automating database maintenance using crontab, see our blog Laravel Automatic Daily Database Backup Example to schedule daily backups and keep your data safe using cron jobs.