
Capturing user inputs should feel simple and safe. If you want to work with Form Data using POST in Express JS, this tutorial will take you through a clean, real-world flow. You will be using the Express JS POST method to get data in Express JS, validate it, and return a helpful response. We’ll keep it practical with a full Express JS POST request example, along with a tiny HTML page that you can copy, run, and reuse in minutes.
Why use POST for Express JS form data handling?
- It keeps sensitive data out of the URL.
- It supports larger payloads and richer inputs.
- It matches how most forms send data.
- It makes validation and error handling straightforward.
Project Setup
Let’s create new project for this implementation. For this example, we will use this setup. You can use existing setup for this. Open your terminal and enter below commands:
mkdir express-post-form
cd express-post-form
npm init -y
npm i express cors
touch server.js
It will create new express application with cors enabled. Here, It will also create server.js file.
Example of Form Data with POST in Express JS
Let’s create some basic setup for server to manage post request. Here, we will take an example for post request to receive contact details on server. You will also use cors to setup with json module. Modify server.js as below:
const express = require('express')
const cors = require('cors')
const app = express()
const submissions = []
app.use(cors())
app.use(express.json())
app.use(express.urlencoded({ extended: true }))

app.post('/contact', (req, res) => {
  const { name, email, message } = req.body
  if (!name || !email || !message) {
    return res.status(400).json({ ok: false, error: 'Missing required fields' })
  }
  const entry = { id: Date.now(), name, email, message }
  submissions.push(entry)
  res.json({ ok: true, entry })
})

app.get('/submissions', (req, res) => {
  res.json({ ok: true, submissions })
})

app.listen(3000, () => {
  console.log('Server running on http://localhost:3000')
})
Here, we have created pages for receiving contact form details and show it user on submission page. The contact data is name, email and message you can customize it for more data.
Setting up HTML form for Contact Form
Let’s create an basic HTML form to get inputs for contact information like name, email and message. It will be used as our frontend for express js backend. Create new file called contact.html and enter below code:
<!doctype html>
<html lang="en">
<head>
  <meta charset="utf-8">
  <title>Contact</title>
</head>
<body>
  <form id="contact-form">
    <input name="name" placeholder="Your name" required>
    <input name="email" type="email" placeholder="Email" required>
    <textarea name="message" placeholder="Message" required></textarea>
    <button type="submit">Send</button>
  </form>
  <pre id="out"></pre>
  <script>
    const form = document.getElementById('contact-form')
    const out = document.getElementById('out')
    form.addEventListener('submit', async e => {
      e.preventDefault()
      const data = Object.fromEntries(new FormData(form))
      const res = await fetch('http://localhost:3000/contact', {
        method: 'POST',
        headers: { 'Content-Type': 'application/json' },
        body: JSON.stringify(data)
      })
      const json = await res.json()
      out.textContent = JSON.stringify(json, null, 2)
    })
  </script>
</body>
</html>
You can even test it from terminal using cURL request but you need to run express app before that.
curl -X POST http://localhost:3000/contact \
  -H "Content-Type: application/json" \
  -d '{"name":"Alex","email":"alex@example.com","message":"Hello"}'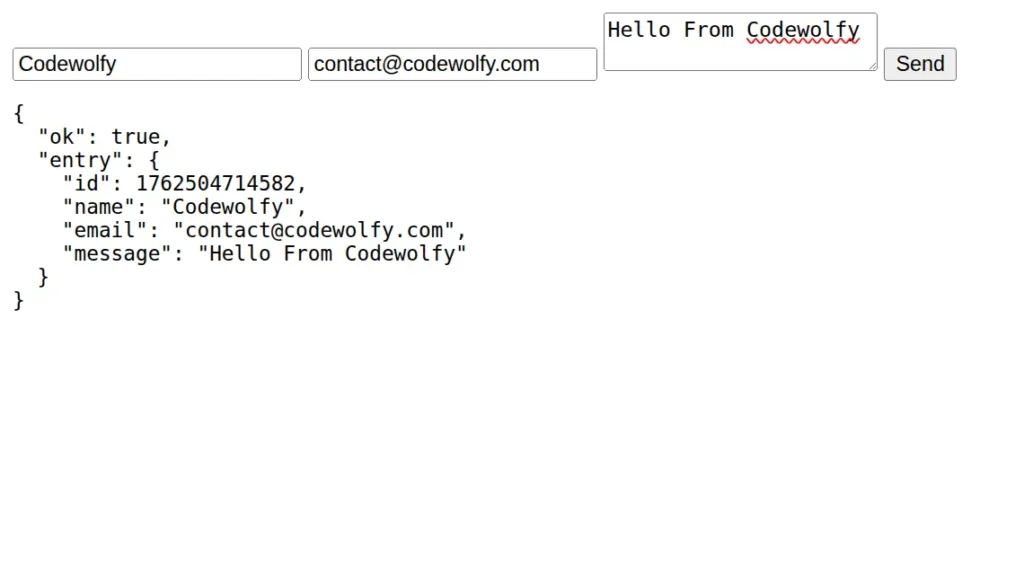
It will submit data through post request and show same submitted data to the users.
Conclusion
You can get form data in Express JS by using a clean POST route with tiny validation and friendly responses. This Express JS flow for the POST method can be easily reused across contact forms, onboarding steps, and feedback widgets.
Looking to level up from simple form inputs to file uploads? Check out Build an Image Upload REST API in Node JS and Express to learn multipart/form-data handling, image validation, and secure storage in Express It’s an ideal next step after working with POST forms.