You roll out a brand new app after spending so much time developing it. You are feeling proud of what you have accomplished. Then your notification center goes into overdrive. It’s not from customers. Rather, it’s spam entries advertising “cheap SEO services” or “cryptocurrencies.” You’ve now ruined the fun that comes with deployment. You want a gatekeeper that ensures bots are kept away while human traffic flows freely. This is exactly where Google reCAPTCHA v3 in Laravel 12 helps us out.
In contrast to previous versions, version 3 of the library does not require the user to solve puzzles or pick traffic lights. It operates in the background. It is based on behavior and provides a score. In the following tutorial, you will see how to implement such a useful feature in your Laravel 12 application and keep your forms clean.
What is Google reCAPTCHA?
Google reCAPTCHA is a free security service that protects your website from fraud and abuse. It uses an advanced risk analysis engine to tell humans and bots apart.
While v2 asks users to click “I am not a robot,” v3 is invisible. It returns a score between 0.0 and 1.0. A score of 1.0 is likely a human, while 0.0 is likely a bot. You decide the threshold for blocking actions.
Key Benefits:
- Stops automated attacks without user interaction.
- Improves user experience by removing annoying puzzles.
- Provides a granular score to determine suspicious activity.
- Works on both desktop and mobile devices seamlessly.
- Protects login pages, contact forms, and newsletter signups.
- Increases legitimate conversion rates by reducing friction.
Creating API Credentials for Google Recaptcha
You must register your site with Google before writing any code. This process generates the keys your application needs to talk to the reCAPTCHA server.
To create API credentials navigate to the Google reCAPTCHA Admin Console and create new site. Enter label or name for project and identify it later. Add localhost for domain to test into local development and select existing project or create new one.
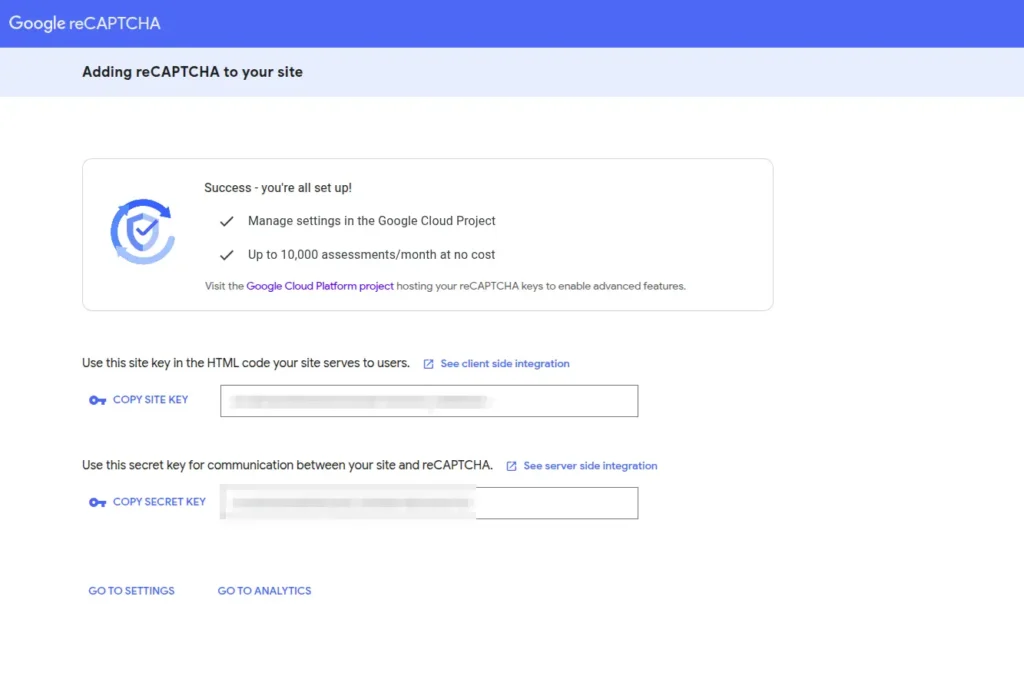
Google will provide a Site Key and a Secret Key. Copy these immediately. You will need them for the next step. open your .env file and add these keys with variable name like below:
GOOGLE_RECAPTCHA_SITE_KEY=your_site_key_here
GOOGLE_RECAPTCHA_SECRET_KEY=your_secret_key_here
Google Recaptcha Example with Contact Us Form
Let’s take a practical example to build a secure contact form. We will create a validation rule to handle the communication with Google and a controller to process the request.
Define the Route
Open your routes/web.php file. We need two routes: one to display the form and one to handle the submission.
use App\Http\Controllers\ContactController;
use Illuminate\Support\Facades\Route;

Route::get('contact', [ContactController::class, 'index'])->name('contact.index');
Route::post('contact', [ContactController::class, 'store'])->name('contact.store');
Create the Controller
Create a controller to handle the form data. We will apply our new Recaptcha rule here to ensure the request is legitimate before processing the email.
php artisan make:controller ContactControllerLet’s modify controller to with 2 methods. First one will show contact form page and another one will handle submit event with data validation and record insert into database or any other operations like sending email.
<?php

namespace App\Http\Controllers;

use App\Rules\Recaptcha;
use Illuminate\Http\Request;

class ContactController extends Controller
{
    public function index()
    {
        return view('contact');
    }

    public function store(Request $request)
    {
        $request->validate([
            'name' => ['required', 'string', 'max:255'],
            'email' => ['required', 'email'],
            'message' => ['required', 'string'],
            'g-recaptcha-response' => ['required', new Recaptcha],
        ]);

        // Insert record into database

        // Send notification email

        return back()->with('success', 'Form submitted successfully!');
    }
}
Here it’s just validation request with data and also checking google recaptcha response with API with our custom validation rule.
Creating Custom Validation Rule for Google ReCAPTCHA
Laravel 12 allows for elegant custom validation rules. We will create a rule that sends the token to Google and checks the score. Run this command in your terminal:
php artisan make:rule RecaptchaUpdate the generated file with the logic below. This script sends a POST request to Google’s verification server using the Laravel HTTP client.
<?php

namespace App\Rules;

use Closure;
use Illuminate\Contracts\Validation\ValidationRule;
use Illuminate\Support\Facades\Http;

class Recaptcha implements ValidationRule
{
    /**
     * Run the validation rule.
     *
     * @param  \Closure(string, ?string=): \Illuminate\Translation\PotentiallyTranslatedString  $fail
     */
    public function validate(string $attribute, mixed $value, Closure $fail): void
    {
        $response = Http::asForm()->post('https://www.google.com/recaptcha/api/siteverify', [
            'secret' => env('GOOGLE_RECAPTCHA_SECRET_KEY'),
            'response' => $value,
        ]);

        $body = $response->json();

        if (!($body['success'] ?? false) || ($body['score'] ?? 0) < 0.5) {
            $fail('The google recaptcha verification failed.');
        }
    }
}
It will pass frontend value to google API and verify user and captcha is valid or not and based on that it will show validation message.
The Blade View (Frontend)
The last thing pending is to create frontend part for taking inputs for contact form. Create new file called contact.blade.php inside views directory and modify as below:
<!DOCTYPE html>
<html>
<head>
    <title>Laravel 12 Google reCAPTCHA v3 Example</title>
    <meta name="viewport" content="width=device-width, initial-scale=1">
    <link href="https://cdn.jsdelivr.net/npm/bootstrap@5.3.0/dist/css/bootstrap.min.css" rel="stylesheet">
    <script src="https://www.google.com/recaptcha/api.js?render={{ env('GOOGLE_RECAPTCHA_SITE_KEY') }}"></script>
</head>
<body>

<div class="container mt-5">
    <div class="card">
        <div class="card-header">
            <h3>Contact Us</h3>
        </div>
        <div class="card-body">

            @if(session('success'))
                <div class="alert alert-success">
                    {{ session('success') }}
                </div>
            @endif

            @if($errors->any())
                <div class="alert alert-danger">
                    <ul>
                        @foreach($errors->all() as $error)
                            <li>{{ $error }}</li>
                        @endforeach
                    </ul>
                </div>
            @endif

            <form method="POST" action="{{ route('contact.store') }}" id="contactForm">
                @csrf
                <input type="hidden" name="g-recaptcha-response" id="g-recaptcha-response">

                <div class="mb-3">
                    <label>Name:</label>
                    <input type="text" name="name" class="form-control" required>
                </div>

                <div class="mb-3">
                    <label>Email:</label>
                    <input type="email" name="email" class="form-control" required>
                </div>

                <div class="mb-3">
                    <label>Message:</label>
                    <textarea name="message" class="form-control" required></textarea>
                </div>

                <button type="submit" class="btn btn-primary">Send Message</button>
            </form>
        </div>
    </div>
</div>

<script>
    document.getElementById('contactForm').addEventListener('submit', function(event) {
        event.preventDefault();
        grecaptcha.ready(function() {
            grecaptcha.execute('{{ env('GOOGLE_RECAPTCHA_SITE_KEY') }}', {action: 'submit'}).then(function(token) {
                document.getElementById('g-recaptcha-response').value = token;
                document.getElementById('contactForm').submit();
            });
        });
    });
</script>

</body>
</html>
Notice how we add a hidden input field named g-recaptcha-response. The JavaScript function grabs the token from Google and puts it into this hidden field before the form submits.
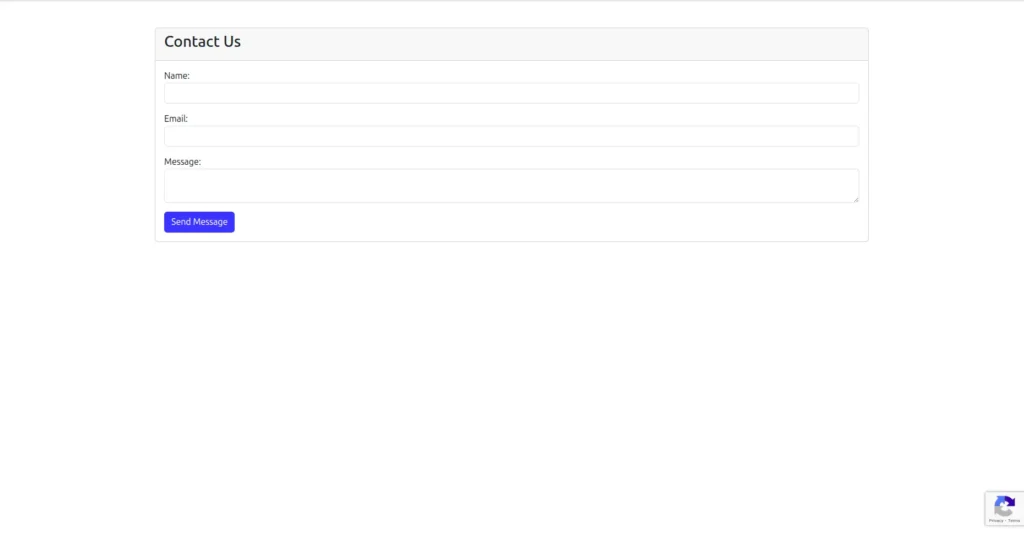
We have also used bootstrap for basic styles and UI. This code listens for the submit event. It pauses the submission, asks Google for a token, assigns that token to the hidden input, and then releases the form to the server.
Output:
Conclusion
Spam can indeed be an annoying feature, but it is not always a nightmare situation. You now have a spam defense mechanism in place and functioning effectively. The integration of Google reCAPTCHA v3 in your Laravel 12 project also ensures a seamless and professional interface for your users while preventing your database from receiving spams, or in simpler terms, unwanted data entries. Your users will appreciate your hidden security measures in place while your administrators also enjoy a spam-free interface.