Nowadays, there is no way to avoid the topic of RESTful APIs when building back-end resources for a mobile application or developing a web application. An API is an interface, that allows two software programs to communicate with each other. Notably, it does not maintain a session state between requests, hence, you will need to use tokens to authenticate and authorize users of your application.
For web developers, we need to authenticate our users via API requests. In Laravel itself, besides its full-stack development, we have many options on how to authenticate the requests. Laravel Passport provides a full OAuth2 server implementation for your Laravel application in minutes. Passport is built on the League OAuth2 server that Andy Millington and Simon Hamp maintain.
What We’ll Build
To understand API security, we will build an API that provides authentication methods and CRUD operation of posts :
- Registering user
- Logging in and out
- Perform CRUD operation for posts.
Setting Up a Laravel Web Service Project
Let’s begin to create our fresh Laravel application for API Authentication using Passport
composer create-project --prefer-dist laravel/laravel LaravelPassportApiThis will create a new folder named LaravelPassportApi containing our Laravel application. Now would be a good time to start the Laravel application to make sure everything is working as expected:
cd LaravelPassportApi
php artisan serve
Database Configuration
Let’s configure a database for our application. If you don’t have a database then create a new one. After creating the database open the .env file from the root directory of your project. if the .env file is missing from the project then copy content from the .env.example and create the file. The .env file defines many common environment variables.
DB_CONNECTION=mysql
DB_HOST=127.0.0.1
DB_PORT=3306
DB_DATABASE=**********
DB_USERNAME=*********
DB_PASSWORD=*********
Installation and Setup of Laravel Passport
First of all, let’s add Laravel Passport to it. We need to install Laravel Passport into our application using Composer:
composer require laravel/passportPassport will need to store OAuth2 clients and access tokens in some database tables, so it creates migrations for the tables during installation. So next thing we need to do is run migrations :
php artisan migrateTo generate secure access tokens for your application, Passport requires some encryption keys and two clients known as Laravel Personal Access Client and Laravel Password Grant Client. To create these keys and encryption clients, run the following command:
php artisan passport:installThe Passport package comes with some routes used to issue and revoke access tokens. To register and use these routes, we need to call the Passport::routes() method inside the boot method in your AuthServiceProvider.
Navigate to App\Providers\AuthServiceProvider and update it.
<?php

namespace App\Providers;

use Illuminate\Foundation\Support\Providers\AuthServiceProvider as ServiceProvider;
use Illuminate\Support\Facades\Gate;
use Laravel\Passport\Passport; //Add this line

class AuthServiceProvider extends ServiceProvider
{
    /**
     * The policy mappings for the application.
     *
     * @var array
     */
    protected $policies = [
        'App\Models\Model' => 'App\Policies\ModelPolicy', //Uncomment this line
    ];

    /**
     * Register any authentication / authorization services.
     *
     * @return void
     */
    public function boot()
    {
        $this->registerPolicies();

        Passport::routes(); //Add this line
    }
}
After changes into AuthServiceProvider, we are ready to handle all authentication and authorization processes within your application.
Now we have to set which authentication guard will handle incoming API requests. Open the config/auth.php file and make the following changes :
<?php

return [
    ...

    'guards' => [
        'web' => [
            'driver' => 'session',
            'provider' => 'users',
        ],

        'api' => [
            'driver' => 'passport', //set passport driver
            'provider' => 'users',
            'hash' => false,
        ],
    ],

    ...
];
One very last thing we need to update the User model before starting API development.
Open the app/Models/User.php file and add the following modifications:
<?php

namespace App\Models;

use Illuminate\Contracts\Auth\MustVerifyEmail;
use Illuminate\Database\Eloquent\Factories\HasFactory;
use Illuminate\Foundation\Auth\User as Authenticatable;
use Illuminate\Notifications\Notifiable;
use Laravel\Passport\HasApiTokens; //Add this line

class User extends Authenticatable
{
    use HasFactory, Notifiable, HasApiTokens; //update this line


    protected $fillable = [
        'name',
        'email',
        'password',
    ];

    protected $hidden = [
        'password',
        'remember_token',
    ];

    protected $casts = [
        'email_verified_at' => 'datetime',
    ];
}
Create Register and Login
Now, our setup is complete and we can perform API requests. First of all, we will create API endpoints for authentication.
In this example, we will just create a register and login functionality with API. so we will need a controller to perform those actions. Enter the below command to create a new controller for API authentication :
php artisan make:controller ApiAuthControllerIt will create a new controller. In this controller, we will create two functions that handle login and register functionality.
Navigate to App\Http\Controller\ApiAuthController and update as below.
<?php

namespace App\Http\Controllers;

use App\Models\User;
use Illuminate\Http\Request;
use Hash;

class ApiAuthController extends Controller
{
    /**
     * Register
     */
    public function register(Request $request)
    {
        $this->validate($request, [
            'name' => 'required|min:4',
            'email' => 'required|unique:users|email',
            'password' => 'required|min:8',
        ]);

        $user = User::create([
            'name' => $request->name,
            'email' => $request->email,
            'password' => Hash::make($request->password)
        ]);

        $token = $user->createToken('ApiToken')->accessToken;

        return response()->json(['type' => 'Bearer','token' => $token], 200);
    }

    /**
     * Login
     */
    public function login(Request $request)
    {
        $data = [
            'email' => $request->email,
            'password' => $request->password
        ];

        if (auth()->attempt($data)) {
            $token = auth()->user()->createToken('ApiToken')->accessToken;
            return response()->json(['type' => 'Bearer', 'token' => $token], 200);
        } else {
            return response()->json(['error' => 'Unauthorised'], 401);
        }
    }
}
The register function will take the request object which contains the name, email, and password of the user. First of all, it will validate the user request and if the request is valid then it will create a user and assign an authentication token to it. While on the other end login function will check credentials and return a token as a response.
In both functions, we will return type and token as response with passport authentication token type is Bearer by default. We need this token in a further API request to validate the user is authorized to perform those actions.
Create Posts Functionality
Before performing post-CRUD, we need to define the database table design and create a database table for posts. Let’s create a Post model and migration using the below command :
php artisan make:model Post -mThis command will create 2 files first one is model and the second is migration. You will see the posts migration file in the database/migrations/timestamp_create_posts_table.php and App/Models/Post.php.
Let’s change the migration file to store relevant information like user, title of post, and post details.
<?php

use Illuminate\Database\Migrations\Migration;
use Illuminate\Database\Schema\Blueprint;
use Illuminate\Support\Facades\Schema;

class CreatePostsTable extends Migration
{
    /**
     * Run the migrations.
     *
     * @return void
     */
    public function up()
    {
        Schema::create('posts', function (Blueprint $table) {
            $table->increments('id');
            $table->foreignId('user_id')->constrained();
            $table->string('title');
            $table->text('description');
            $table->timestamps();
        });
    }

    /**
     * Reverse the migrations.
     *
     * @return void
     */
    public function down()
    {
        Schema::dropIfExists('posts');
    }
}
Here, we have defined the user column as a foreign key for the user table, the title as a string, and the description as a text data type. while creating a post we will ask the user to enter the title and description for the post.
Next, open the app/Models/Post.php file add the following values inside the $fillable array and create a relation between the user and the post table.
<?php

namespace App\Models;

use Illuminate\Database\Eloquent\Factories\HasFactory;
use Illuminate\Database\Eloquent\Model;

class Post extends Model
{
    use HasFactory;

    protected $fillable = [
        'title',
        'description'
    ];

    public function user(){
        return $this->belongsTo(User::class);
    }
}
Let’s define as many relations between users and posts for further usage. Open the User model and add the following lines to it.
public function posts()
{
    return $this->hasMany(Post::class);
}
At last, run the migration by using the below command :
php artisan migrateIt will create a posts table in the database. Now we need to create a controller to handle CRUD operation for posts. Open the terminal and enter the below command :
php artisan PostControllerAdd the following code in app/Https/Controllers/PostController.php file.
<?php

namespace App\Http\Controllers;

use Illuminate\Http\Request;
use App\Models\Post;

class PostController extends Controller
{
    public function index()
    {
        $posts = auth()->user()->posts;

        return response()->json([
            'success' => true,
            'data' => $posts
        ]);
    }

    public function show($id)
    {
        $post = auth()->user()->posts()->find($id);

        if (!$post) {
            return response()->json([
                'success' => false,
                'message' => 'Post not found '
            ], 400);
        }

        return response()->json([
            'success' => true,
            'data' => $post->toArray()
        ], 400);
    }

    public function store(Request $request)
    {
        $this->validate($request, [
            'title' => 'required',
            'description' => 'required'
        ]);

        $post = new Post();
        $post->title = $request->title;
        $post->description = $request->description;

        if (auth()->user()->posts()->save($post))
            return response()->json([
                'success' => true,
                'data' => $post->toArray()
            ]);
        else
            return response()->json([
                'success' => false,
                'message' => 'Something went wrong. Please Try Again'
            ], 500);
    }

    public function update(Request $request, $id)
    {
        $post = auth()->user()->posts()->find($id);

        if (!$post) {
            return response()->json([
                'success' => false,
                'message' => 'Post not found'
            ], 400);
        }

        $updated = $post->fill($request->all())->save();

        if ($updated){
            return response()->json([
                'success' => true
            ]);
        }else{
            return response()->json([
                'success' => false,
                'message' => 'Something went wrong. Please Try Again'
            ], 500);
        }
    }

    public function destroy($id)
    {
        $post = auth()->user()->posts()->find($id);

        if (!$post) {
            return response()->json([
                'success' => false,
                'message' => 'Post not found'
            ], 400);
        }

        if ($post->delete()) {
            return response()->json([
                'success' => true
            ]);
        } else {
            return response()->json([
                'success' => false,
                'message' => 'Something went wrong. Please Try Again'
            ], 500);
        }
    }
}
Here, we have created CRUD functionality for posts. Those functions will return JSON data as a response.
Define API Routes
Now, we will define API routes for register, login, and post CURD functionality. Go to the routes/api.php file and make the following changes.
<?php

use App\Http\Controllers\ApiAuthController;
use App\Http\Controllers\PostController;
use Illuminate\Http\Request;
use Illuminate\Support\Facades\Route;

Route::post('register', [ApiAuthController::class, 'register']);
Route::post('login', [ApiAuthController::class, 'login']);
Route::middleware('auth:api')->group(function () {
    Route::resource('posts', PostController::class);
});
Test Laravel Passport API
Now, we completed all the necessary steps to create Laravel passport API. It’s time to test our API. First run the application server using this command :
php artisan serveHere, we will use Postman for testing API endpoints. So open Postman and create a new project or request.
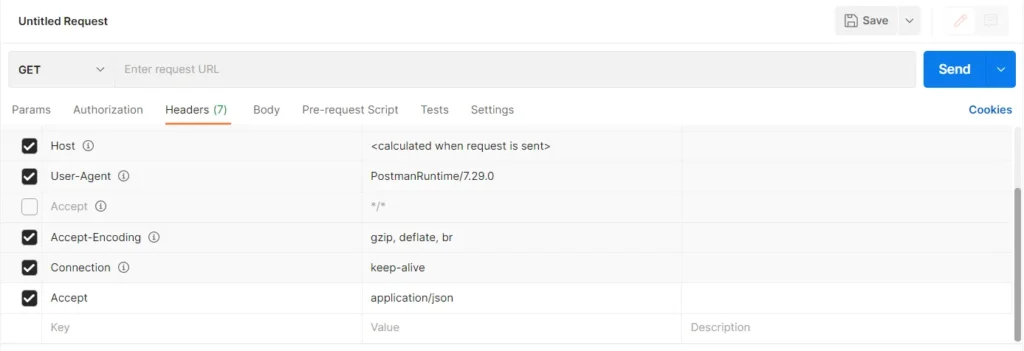
Before sending a Postman request you need to set the header as “Accept”: application/json.
Register API
First of all, we will check the register API. As we know we need a name, email, and password to register users into our application then we need to pass it as a parameter.
http://localhost:8000/api/register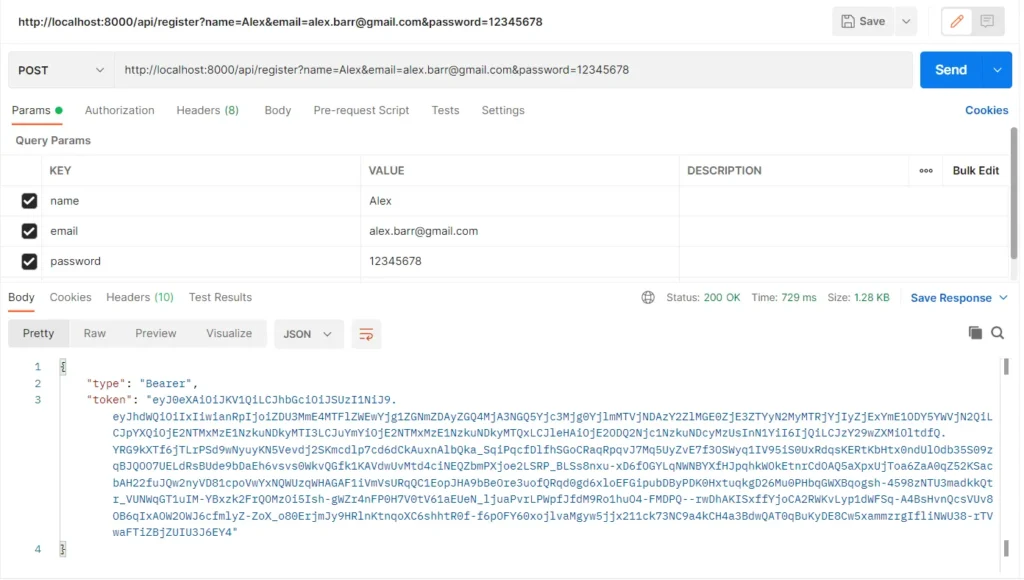
Please verify the method POST for the register user endpoint. As you can see in the image as the response you will get a token and its type. We will need them for login requests or post-related operations.
Login API
Now the user is created. We can use credentials and log in to the user account using the login endpoint. We need to pass email and password as request parameters.
http://localhost:8000/api/login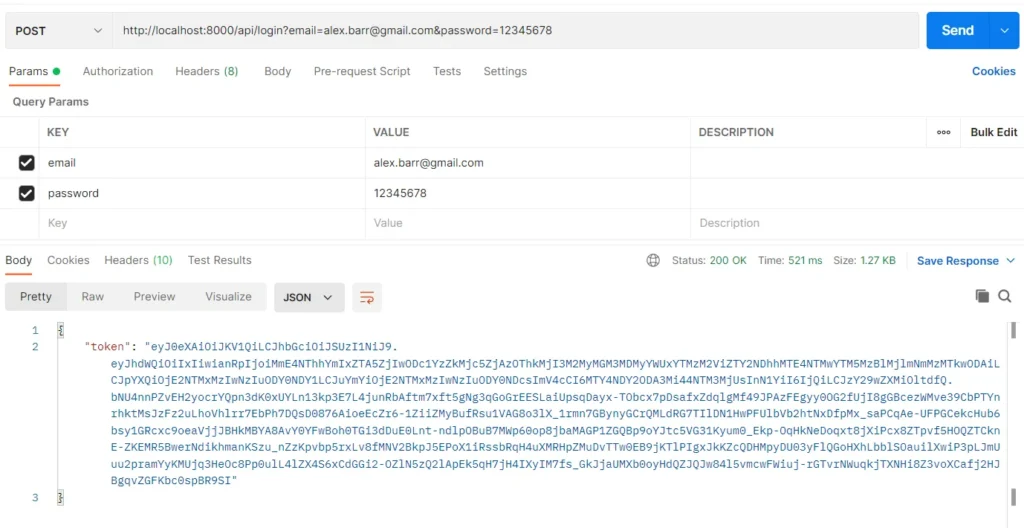
Post APIs
Register & login will also return a token on success. We will pass that token while calling further APIs. To set up a token with a request open the Authorization tab and select Bearer as the type. Then place the token into a token field. Please check the below image as a reference for requesting all post endpoints.
http://localhost:8000/api/posts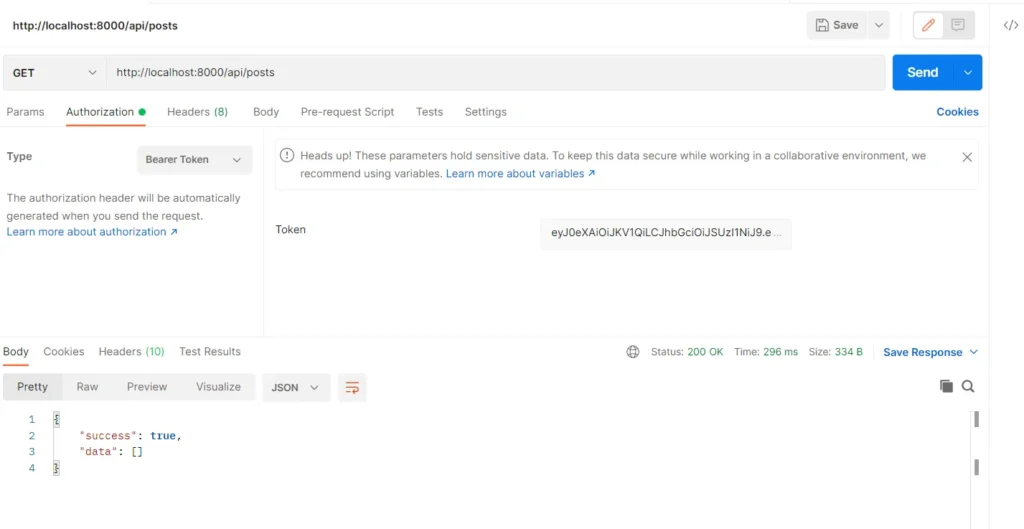
Now you can check all endpoints by passing a token and selecting the method as per request.
Conclusion
Now, we have completed the Laravel Passport API authentication example with CRUD operation. Here, we have checked every aspect needed to build secure REST APIs in Laravel using Passport Authentication. Perform step-by-step setup to overcome errors and if you still have any doubts feel free to place a comment.